


If you’re a freelance designer, vlogger, or online seller in the Philippines, handling your business finances can feel intimidating. Many creatives start their passion projects without much financial background, but understanding basic accounting is key to growing and sustaining your venture.
In this guide, we’ll break down the Philippines’ accounting for creatives in simple terms. You’ll learn bookkeeping for freelancers, BIR registration for vloggers, tax rules for online sellers, and practical tips to keep your finances on track.
Why Creatives Need Basic Accounting
Turning your creative passion into a business means you become an entrepreneur, too. That comes with responsibilities – especially managing money and taxes. Here’s why learning accounting basics matters:
- Stay Legally Compliant: In the Philippines, freelancers and online entrepreneurs are required to register with the BIR and pay taxes, regardless of income size. Not complying can lead to heavy fines or even legal trouble. It’s better to file properly than risk penalties or a full-blown tax investigation (which the BIR has warned even social media influencers about).
- Build Credibility and Opportunities: Paying taxes and issuing official receipts shows you’re a legitimate professional. Many corporate clients will ask for your Tax Identification Number (TIN) and BIR-registered receipts before doing business. Being able to provide these can help you land projects that you might otherwise miss out on.
- Understand Your Finances: Good bookkeeping lets you see if you’re actually earning profit from your craft. By tracking income and expenses, you can tell which projects or products are most profitable and make informed decisions. It also helps when applying for loans or visas, your filed Income Tax Returns (ITRs) serve as proof of income.
- Peace of Mind: Instead of guessing where your money went, you’ll have records. This reduces stress (especially during tax season) and helps you focus more on your creative work.
In short, a bit of financial literacy empowers you to run your creative business responsibly and confidently.
Separating Personal and Business Finances
One of the first principles of small business accounting is to separate your personal and business finances. Comingling funds can lead to confusion and messy records. Here’s how to do it:
- Open a Separate Bank Account or E-Wallet for Your Business. Even if you’re a one-person enterprise, having a dedicated account for business income and expenses is crucial. It shows exactly how much money is flowing through your creative business, and makes tax prep much easier. For example, deposit payments from clients or YouTube earnings into a business bank account, and use that account (or a business e-wallet like a separate GCash) to pay for equipment, software subscriptions, etc.
- Use a Separate Credit/Debit Card if Possible. This further isolates business expenses. Swiping a dedicated card for business purchases (ads, travel, supplies) creates a clear paper trail. Many banks offer accounts or cards for self-employed individuals. Find one that suits your needs.
- Avoid Cash for Business Expenses. Whenever you can, use digital payments or cards so that every transaction has a record. This “digital trail” will simplify bookkeeping and provide proof for tax deductions. If you must use cash, note it down and keep the receipt, but minimizing cash use is best.
By separating accounts, you’ll know which money is truly your business profit (and not accidentally spending your personal savings). It also simplifies calculating net income because you won’t mix in the grocery bills or personal expenses.
Tracking Income and Expenses Consistently
Basic bookkeeping doesn’t require fancy accounting knowledge – it means recording all money coming in and going out of your business. Make it a habit to track these consistently:
- Log Every Income Source: As a creative, you might have multiple income streams – e.g., a vlogger might earn from YouTube AdSense, sponsored posts, and maybe selling merch; a designer might have client project fees and stock photo royalties. Record each payment you receive, noting the date, amount, and source. If you’re paid via online platforms or banks, save those transaction records. Remember that even income from overseas clients or YouTube is taxable in the Philippines, so include it in your records (converted to PHP).
- Record All Business Expenses: Keep receipts (physical or digital) for anything you spend on the business – for example, a new camera for your vlogging setup, art supplies, internet bills, marketplace seller fees, or commute costs to a client meeting. These can be deducted as business expenses to lower your taxable income, as long as they are properly documented. Consider scanning or photographing paper receipts and storing them in a folder, and back them up in cloud storage. Many first-timers neglect this and scramble at year-end to recall expenses. Good record-keeping will save you headaches.
- Use a Book or Spreadsheet: The BIR will require you to register “Books of Accounts” (like journals or ledgers) when you register. You can use physical record books or a simple spreadsheet software to log entries. For each transaction, note the date, description, and amount (categorize as income or specific expense type). Regularly updating this (say weekly) will prevent you from forgetting transactions. It’s also useful for generating financial reports so you can see your profit or loss.
- Keep Personal Drawings Separate: If you pay yourself from the business, record that too (e.g., “Owner’s draw ₱5,000”). This isn’t an expense (for tax purposes, it’s part of profit), but noting it helps you track cash flow.
By keeping detailed records of payments received and money spent, you ensure you can “account” for every peso. This habit makes filing taxes much easier since you’ll already have totals for income and deductible expenses. Plus, if BIR ever asks or audits, you have organized proof to show.
Proper Invoicing and Official Receipts
Invoicing is how you bill clients or brands, and official receipts (ORs) are how you acknowledge a completed sale or payment. Handling these properly is important for both getting paid and staying BIR-compliant:
- Issue Invoices or Billing Statements for Work Done: When you finish a project or deliver an order, send an invoice to your client detailing the amount due, a description of the service/product, and your payment details. This is especially important for freelance creatives – prompt invoicing means faster payment. Many freelancers delay sending invoices, but it only delays your cash inflow. Make it a habit to invoice immediately after completing a project or at month-end for ongoing work. There are templates and tools that can generate professional invoices in minutes.
- Register Official Receipts with BIR: Once you register your business, the BIR requires you to have official receipts or invoices printed by an accredited printer (or use BIR’s online system if available). You must issue an official receipt for every payment you receive; this is a common requirement that new freelancers sometimes overlook. For example, if a brand pays you for a sponsored vlog, they will likely ask for an OR. If you sell products on Shopee/Lazada, you should issue a sales invoice or OR to the buyer (some small sellers include a manual receipt in the package). Official receipts are not just bureaucratic paper; they serve as proof of income (useful for loan or visa applications), and your clients can use them for their accounting too.
- Note: As of 2024, BIR rules have been updated to streamline receipts. What used to be called “Official Receipt” for services is now essentially treated as a “Service Invoice”; invoices are now the primary proof of sale even for services, with ORs becoming supplementary. In practice, this means you should ensure you have BIR-authorized invoices to issue (don’t worry, the process and information on them is similar to ORs, just the title and format might differ). If you still have unused OR booklets, BIR allows converting them to valid invoices by stamping or marking them accordingly. The key point is to always issue a BIR-registered document for each sale, whether it’s called an invoice or receipt, to stay compliant.
- What to Include on Invoices/ORs: Your registered name (or business name), TIN, business address, and the details of the transaction (date, description, amount). If you’re VAT-registered, the receipt/invoice should show VAT breakdown; if not, it typically says “non-VAT” or “VAT-exempt”. For services, ORs mark payment received; for goods, sales invoices are used. Make sure the serial numbers are BIR-approved. Your printer or accounting software will handle the format, but you need to issue them sequentially and keep duplicates for your records.
Tip: Keep a log of the OR/invoice numbers you issue and to whom. Also, never use unofficial receipts (like receipts not authorized by BIR) for business transactions – that’s a violation. Stick to your official booklets or system.
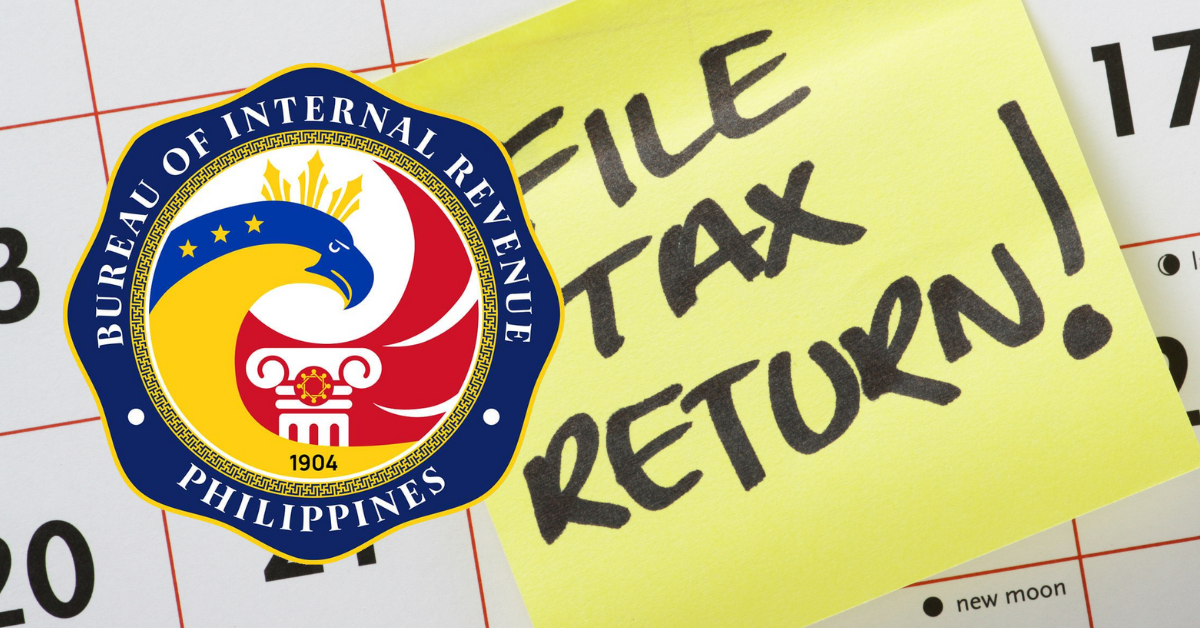
BIR Registration for Freelancers and Vloggers
Now let’s talk about getting legal – registering your business with the Bureau of Internal Revenue (BIR). Even if you’re a solo content creator or a small online shop, you are required to register. The process may seem daunting, but it’s quite standard. Here’s a simplified step-by-step:
- Get a Tax Identification Number (TIN): If you’ve been employed before, you likely already have a TIN. If not (e.g., a fresh graduate or purely earning from platforms without a TIN), you’ll need to apply for one. This is done via BIR Form 1901 (for self-employed registration) or Form 1902/1904 in some cases. No TIN, no tax – so this is the first step. If you have a TIN issued from a previous job, you will update your registration to transfer to the RDO (Revenue District Office) where your business is located.
- Decide on Your Business Type – Professional or Sole Proprietor: A professional (self-employed) means you’ll operate under your own name (e.g., Juan dela Cruz, Professional YouTuber). A sole proprietorship means you want a business name (e.g,. “Dela Cruz Creatives Studio”). If you choose a business name, you must register that name with DTI (Department of Trade and Industry) and usually secure a barangay clearance and a Mayor’s permit for a business. Many freelancers opt to register as professionals using their own name to skip the DTI and local permits. Either way, for BIR purposes, you’ll be a single taxpayer. Choose what makes sense – if you’re branding a shop or agency, a business name is good; if you’re just a personal brand (vlogger/blogger using your name), professional registration is fine.
- Fill out BIR Form 1901 and submit it at your RDO: This is the form for self-employed and mixed-income individuals. At the RDO, tell the officer you’re registering as a freelancer (some BIR offices have a help desk or even a special lane for new registrants – don’t be shy to ask). Bring at least one (1) valid government ID and photocopies. If you registered a business name, bring your DTI certificate and local business permit requirements. If you don’t have a TIN yet, you will also fill out Form 1905 to get a new TIN issued (Form 1905 is normally for updates, but it’s also used to issue a TIN for first-timers at the RDO).
- Pay the Registration Fee: BIR charges a ₱500 annual registration fee for new businesses. You pay this to an Authorized Agent Bank or sometimes at the BIR cashier. They’ll also ask you to buy documentary stamp tax (DST) worth ₱30 (one-time for the registration documents). Keep the receipts of these payments as you’ll attach them to your file.
- Attend the BIR seminar (if required): After processing your forms, BIR might schedule you for a short orientation seminar (sometimes the same day or a later date). This seminar is very useful – they’ll explain your tax filing obligations, deadlines, how to fill out forms, etc.. It’s basically a free crash course on your responsibilities, so pay attention and don’t hesitate to ask questions. (If they don’t mention a seminar, you can still ask if there’s an upcoming one or any briefing materials for new registrants.)
- Register your Books of Account: BIR will ask you to have accounting books (ledgers, journals). You can buy these at bookstores, or BIR might have sets. They need to be stamped/registered by BIR. Even if you plan to use software, you’re expected to maintain these books (you can print ledgers from the software and paste or record them in the books periodically). Common books are: General Journal, General Ledger, Cash Receipt Book, Cash Disbursement Book. The BIR officer will advise which ones you need for your type of business. They will stamp these.
- Apply for Invoices/Receipts – BIR Form 1906: This form is for Authority to Print receipts. You’ll submit it, and BIR will issue an Authority to Print (ATP) document listing the details for your official receipts/invoices. You then take that to a BIR-authorized printing press to have your receipt booklets made. Alternatively, BIR may allow use of its own Electronic Invoicing or computer-generated receipts, but as a freelancer, it’s usually easiest to print booklets. After printing, bring a sample back to BIR for stamping/registration. (Recently, as mentioned, the terminology is changing from OR to invoice, but the process is the same.)
- Get your Certificate of Registration (COR): Once all is done, BIR will give you a Certificate of Registration (Form 2303), which lists the taxes you need to file (e.g., Income Tax, and either Percentage Tax or VAT). This paper is essentially your business’s birth certificate in the BIR system – keep it safe and also post a copy visibly in your place of business (even if your “business address” is just your home, you should have it on hand).
- Optional – Register with other agencies: If you haven’t already, and if applicable, consider registering with agencies like SSS, PhilHealth, and Pag-IBIG as self-employed, especially if you want to contribute to benefits. These aren’t BIR matters, but part of being “legit” business-wise.
Yes, it’s quite a bit of paperwork (and maybe a few days of running around). But after this one-time setup, you’re officially a registered business owner!
If it’s overwhelming, you can hire an accountant or facilitator to process the registration for you; some charge around ₱2,000–5,000 to handle BIR registration for freelancers. This can save you time, but many do complete it themselves. Once done, you can legally issue receipts and start filing taxes properly.
Taxes for Freelancers, Vloggers, and Online Sellers
With your business registered, you now have to meet tax obligations moving forward. Taxation for self-employed individuals (which includes freelancers, influencers, and small e-commerce sellers) in the Philippines can be summarized into income tax and business tax.
Here’s what you need to know in simple terms:
- Income Tax: This is the tax on your profits or taxable income each year. The Philippines uses a graduated income tax rate for individuals, ranging from 0% up to 35% depending on your income bracket. The first ₱250,000 of annual income is tax-exempt (0% rate). Earnings beyond that are taxed in tiers (20% on the next portion, and so on up to 35% for the highest incomes). However, if your gross sales/receipts do not exceed ₱3 million in a year, you have an alternative option: you can choose an 8% flat income tax on gross revenue (after ₱250k) instead of the graduated rates. This 8% option is simpler because you ignore expenses, but it only makes sense if you have very low expenses or you want to avoid the paperwork of calculating percentage tax (more on that next). Many small freelancers opt for 8% for simplicity. If you don’t opt for 8%, you’ll be under the regular graduated system.
- Business Tax (Percentage Tax or VAT): Aside from income tax, businesses in PH pay a tax on gross sales: either VAT (Value-Added Tax) or Percentage Tax, depending on size. VAT is 12% and generally required if your annual sales exceed ₱3 million (the VAT threshold) or if you voluntarily register as a VAT taxpayer. If you’re VAT-registered, you charge 12% on your sales (output VAT) and can claim credit for VAT on your purchases (input VAT). Percentage Tax is a simpler gross receipts tax for non-VAT small businesses – currently 3% of your gross sales/receipts. If you opt for the 8% flat income tax, you are exempted from the 3% percentage tax (the 8% already covers it). But if you choose the graduated rates, you must additionally file percentage tax on your gross earnings. In summary:
- If you’re below ₱3M sales and on 8% – you pay 8% on gross (beyond ₱250k) and no percentage tax.
- If you’re below ₱3M and on graduated rates – you compute income tax on profit (with brackets) and also pay 3% on gross sales.
- If you’re above ₱3M – you must register for VAT: pay income tax on profit (graduated rates) and 12% VAT on sales (with input VAT credits).
- Filing Schedules: As a self-employed individual, you will be filing taxes throughout the year, not just in April. The BIR requires periodic filings:
- Quarterly Income Tax Returns (ITRs): These are filed three times during the year, usually covering Q1, Q2, Q3 of the calendar year. Then an Annual ITR is filed by April 15 of the next year to finalize the whole year’s tax. For example, for 2025 earnings you’d file quarterly returns in May, August, and November 2025, and the annual return by April 15, 2026. The quarterly forms (BIR Form 1701Q or 1701AQ) and annual form (1701 or 1701A) will calculate your tax due. If you opted 8%, you use Form 1701A; otherwise 1701. Even if your income is zero or below ₱250k (exempt), you still need to file the returns, you just report no or low income.
- Percentage Tax or VAT Returns: These are filed periodically as well. Historically, percentage tax was filed monthly (Form 2551M) on or before the 20th of the following month. Recent regulations have transitioned the percentage tax to a quarterly filing (Form 2551Q), but if in doubt, check your COR or BIR updates. VAT, as of 2023, is filed quarterly (Form 2550Q) instead of the old monthly requirement. So, for non-VAT filers on graduated rates, expect to file percentage tax perhaps quarterly (e.g., by the 25th after each quarter); for VAT, file quarterly by the 25th after each quarter. (Always verify current deadlines with BIR or in the seminar – tax rules do update.)
- Withholding Taxes: If you have employees or subcontractors, or your clients withheld some tax from payments to you, there are forms for withheld tax (e.g., Form 0619E monthly, 1601E quarterly, etc.). Many freelancers starting out won’t deal with these initially, but be aware: if a client withholds 2% on your fee (common for big companies), they will give you a BIR Form 2307 certificate. You can use that to credit against your income tax due. If you ever hire people or rent an office, you might need to withhold taxes as well. But that’s a more advanced topic – just keep any 2307 forms you receive from clients, as they are money saved for you (proof some tax was prepaid).
- Tax Deadlines: It’s critical to mark your calendar with tax due dates. Missing deadlines incurs penalties and interest. Common due dates for a sole proprietor/professional are:
- Income Tax: April 15 (annual) every year; Quarterlies on May 15, Aug 15, Nov 15 (if following 45 days after quarter). (Note: BIR’s deadlines sometimes fall on the 15th or the date indicated on forms – always double-check each year’s official schedule.)Percentage Tax: 20th of the month (if monthly) or 25th after quarter (if quarterly, e.g., April 25 for Q1).VAT: 25th after each quarter (e.g., April 25, July 25, Oct 25, Jan 25).Registration Renewal: January 30 each year – this is when you pay the ₱500 annual registration fee to BIR.
- What about Online Platform Sellers? If you sell on Shopee, Lazada, or even via Instagram/Facebook, you are subject to the same tax rules as any sole proprietor. The government has explicitly required online businesses to register and pay taxes. So if you’re an online seller below ₱3M in sales, you’ll likely be a non-VAT taxpayer and pay either 3% percentage tax + income tax on profit, or 8% on gross. Platforms like Shopee/Lazada do not withhold taxes for you – it’s your responsibility to declare what you earned from them. Keep records of your payouts from these platforms (they usually provide monthly seller reports). For online sellers above ₱3M, you need to add 12% VAT to your prices (or at least be prepared that 12% of your sales goes to VAT). This can be challenging in a competitive market, but some growing businesses voluntarily register for VAT earlier for transparency.
- Social Media Influencers and Creators: As mentioned, even YouTubers and Instagram content creators fall under self-employed professionals. The BIR’s memo in 2021 made it clear that influencers must register, keep books, and pay income and business tax just like other entrepreneurs. So if you earn ad revenue or sponsorships, make sure to follow the same rules. One thing specific to creators: if you receive free products or perks in exchange for promotion, those are technically taxable too – you’re supposed to declare the fair market value of freebies as income. It might sound odd, but that’s the official stance. Many small creators might not bother for a free shirt or gadget, but be aware of the rule, especially if such barter deals form a significant part of your earnings.
Pro Tip: Don’t be afraid to consult a tax professional, especially as your business grows or if your situation is complex. A CPA can help you optimize (like deciding between 8% vs graduated rates) and ensure you’re claiming all allowable deductions.
As one financial advisor notes, investing in good advice can save you from costly mistakes and stress down the line. Even the BIR seminar or helpdesk can clarify things if you’re unsure; take advantage of those free resources.
Helpful Tools for Bookkeeping and Tax Filing
The good news for tech-savvy creatives: you don’t have to do all of this with pen and paper. There are digital tools (many affordable or even free) that can make bookkeeping and tax compliance much easier:
- Expense Tracking & Accounting Software: Instead of manually recording every transaction in a notebook, consider using accounting software or apps. Popular options include QuickBooks Online, Xero, FreshBooks, and Wave. In the Philippines, QuickBooks is widely used and known for its BIR compliance features. Wave is an excellent free software for freelancers and small businesses – it lets you create invoices and track expenses without any subscription fee. These tools can automatically generate financial reports, help reconcile your bank accounts, and some even let you snap photos of receipts to log expenses. They also speed up invoicing – for instance, you can use built-in invoice templates and send them by email, and mark when they’re paid.
- Tax Filing Platforms (PH Specific): Two highly recommended platforms are Taxumo and JuanTax. Taxumo is an accredited online tax filing service in the Philippines that guides you in filling out your BIR forms and even allows you to pay taxes online. It’s very friendly for freelancers – you input your income and expenses, and it computes the tax due and generates the forms. JuanTax is another BIR-accredited solution that accountants often use; it can integrate with accounting software to file your returns. Both can help you avoid trips to the bank or BIR office just to file forms. Using these services can simplify compliance – for example, Taxumo automates your percentage tax and income tax filings so you don’t accidentally forget a deadline. The BPI financial article specifically suggests trying Taxumo or JuanTax to simplify the repetitive tasks of tax filing.
- Invoice and Payment Apps: There are also lightweight tools and apps focused on invoicing – for instance, Wave Invoicing (mobile app) or PayPal business tools if you bill international clients. Some local payment gateways like GCash or PayMongo provide transaction records that can help with tracking sales. While these aren’t full accounting systems, they can be part of your toolkit.
- Spreadsheets and Templates: If you’re not ready to jump into software, even a well-organized Excel or Google Sheets can do wonders. You can use templates for tracking income/expenses or even find ready-made “cashbook” templates. The key is discipline in updating them.
- Backup and Cloud Storage: Whichever system you use, back up your records. If using spreadsheets, keep them in a cloud folder (Dropbox, Google Drive, etc.) so you don’t lose data. If using software, ensure you have an export of data or proper credentials to access it. Also, maintain both digital and physical copies of critical documents (COR, DTI certificate, permits, OR booklets) – scan them and keep them in a secure drive.
By leveraging technology, “doing the books” becomes much less painful. Many tools are quite user-friendly, even if you’re not an accounting expert.
They can send you reminders of deadlines, and some even offer chat support if you get stuck on a tax form field. Using apps is often cheaper than hiring a full-time bookkeeper, and they reduce human error by automating calculations.
For example, imagine you’re a freelance illustrator: you could use QuickBooks or Wave to record all your client payments (in different currencies even), categorize your expenses (hardware, art supplies, internet), and at quarter’s end, the data is ready for you to review and input into Taxumo for filing the quarterly tax. This workflow means minimal manual math and more time for your creative work.
Friendly Advice for Creative Entrepreneurs
Lastly, here are a few extra tips to keep your financial life healthy while you focus on your creative passion:
- Maintain an Emergency Fund: Freelance and online business income can be irregular – you might have a big project one month and none the next, or a sudden expense like a broken camera or a rush shipping cost. Try to set aside part of your earnings in a savings buffer. Aim for 3-6 months of expenses in savings if possible. This cushion will help you weather lean times without panicking (and reduce the temptation to dip into tax money or business funds).
- Budget for Taxes: Remember that not all the money that comes in is yours to keep – a portion will go to taxes. It’s wise to set aside money for taxes as you earn, especially if you’re not using the 8% withholding option. For example, if you’re on 8% gross tax, consider putting aside at least 8% of every payment in a separate account so you can easily pay the quarterly tax. If on graduated, it’s trickier but at least set aside something like 10-15% of each payment (if you’re under ₱250k total you’ll get it back, but if you go beyond, you’re prepared). Don’t fall into the trap of spending everything and then scrambling to pay taxes.
- Watch Your Cash Flow: Pay attention to when clients are supposed to pay you. Some companies pay 30 or 60 days after invoicing. Plan around these cycles so you’re not caught off guard. Also clarify if the payments you receive are gross or net of withholding tax (some clients deduct 2% and send you less). Checking your contracts or agreements for payment terms, as BPI advises, can help you manage your cash flow better.
- Learn as You Go: You don’t have to become a math wizard overnight. As the Edge Tutor article suggests, start small and learn as you go – the important thing is to make the effort to be compliant and improve your financial management over time. With each filing period, you’ll get more comfortable. There are also Facebook communities (like Tax help groups) where you can ask questions, and many freelancers share tips there.
- Consider Professional Help for Complex Matters: While day-to-day bookkeeping you can handle, there might be times to consult a CPA – for example, if you’re unsure about a deductible expense (can that new ring light be expensed? probably yes) or if you plan a big expansion. They can also help you maximize deductions and plan taxes if you have a high income. Maybe hire an accountant to do a year-end review of your books and ITR – they might spot adjustments that save you money legally.
Running the business side of creativity might not be as fun as creating content or art, but it’s what sustains your passion in the long run. By tracking your finances, complying with BIR, and using available tools, you’re investing in the longevity and credibility of your brand.
Remember: Even the most successful Filipino YouTubers, artists, and entrepreneurs have to deal with taxes and accounting – you’re not alone! It’s okay to feel a bit overwhelmed at first, but take it one step at a time.
This guide provides a starting point for accounting basics for creatives in the Philippines, covering topics such as bookkeeping for freelancers and tax for online sellers. Refer back to it anytime. You’ve got the talent; now you also have the know-how to keep the business side running smoothly. Happy creating (and accounting)!
You Might Also Like:
From Side Hustle to Sole Proprietor: How to Register Your Business in the Philippines
Your Ultimate Guide to Cross-Border Taxation for Filipino Remote Workers
Tax Obligations for Filipino Freelancers and Remote Workers: What You Need to Know
Can You Register as a Digital Nomad in the Philippines? Legal and Tax Considerations
- From Davao to Alicante: What No One Tells You About Moving to Spain - 24 February 2026
- Reinventing Yourself in Your 30s: Career, Country, and Calling - 22 February 2026
- The Economics of Global Beauty Pageants: A Deep Financial Breakdown - 22 February 2026